Growing champignons is not exactly a complicated matter, but it requires strict adherence to certain rules: the right choice of place for growing mushrooms, acquiring high-quality mycelium, competent preparation of compost, maintaining humidity and temperature conditions.
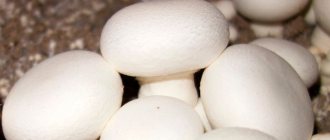
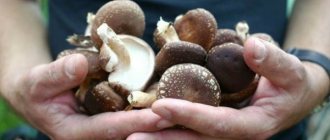
In nature, champignons grow in almost any conditions - from deep forests and steppes to landfills near human settlements and dung mounds near livestock farms. Moreover, there are more than 200 species of these lamellar mushrooms - and almost all of them are edible. In cultivation, people have adapted to grow mainly bisporus champignon, which is distinguished by a “real mushroom” taste and aroma. And the history of champignon cultivation dates back to the 17th century!
Why do champignons need compost?
This living organism lacks chlorophyll. Without chlorophyll, plants cannot synthesize nutrients. For this reason, it is impossible to grow champignons in ordinary garden soil (even if you add fertilizers). They need a special substrate mixture for the proliferation of beneficial microorganisms.
Compost provides the mushrooms with the correct level of moisture, saturates them with useful substances, and creates a loose environment for the root system. This all contributes to accelerating the development of plants, obtaining larger fruiting bodies and a rich harvest.
An organic mixture for growing champignons is sold in specialized stores, but farmers prefer to make the substrate at home. Advantages of making your own compost:
- saving money - the cost of the product in the store is high;
- confidence in quality indicators, absence of chemical additives;
- knowledge about expiration dates (if stored in a warm place for more than 30 days, compost loses its usefulness).
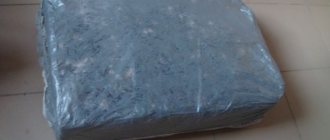
Growing champignons in bags
If you decide to start growing champignons as a business, you should find the cheapest way. World practice suggests using plastic bags for this purpose. In this case, the following conditions must be met:
- Bags are made with a capacity of 25-35 kg. The weight must be capable of being carried by one worker.
- It is important to arrange the bags correctly in order to get the largest number per 1 m. It is most advantageous to arrange them in a checkerboard pattern. In this case, only 10% of the area is lost.
- The geometric dimensions of the bag are selected depending on the size of the room where mushroom production is organized.
Growing mushrooms in bags is considered the cheapest. There is no need to build shelving or fence beds. For work, you can use a suitable room in the country.
This method makes it easy to get rid of diseased or pest-damaged elements. They are localized in a separate bag, which is easy to remove.
Growing champignons at home (part 3)
Types of compost for growing champignons
When growing mushrooms, a variety of nutrient mixtures are used, so it is difficult for an ordinary gardener to make a choice. There are 3 common types of compost.
With natural ingredients
Compost necessarily contains natural components. They are rich in chemical elements:
- nitrogen - found in livestock waste;
- carbohydrates - found in dry plant stems;
- carbons - found in gypsum and chalk, soy, pea and bone meal, malt.
In the wild, mushrooms grow well where horses graze. Horse manure is considered the most suitable source of nitrogen for making compost. It contains a significant amount of microelements.
The ingredient is replaced (usually diluted) with manure from cows, sheep, rabbits and pigs, and bird droppings.
Straw, corn cobs and hay serve as a carbon component - they provide aeration. Poor air flow into the compost contributes to a significant reduction in the efficiency of the mixture.
Gypsum materials are laid in the smallest quantities. They improve the structure of the substrate, saturating it with natural minerals.
The basic composition of natural compost for mushrooms:
- 100 kg of horse manure;
- 15 kg of dry bird droppings;
- 50 kg of straw;
- 3 kg of crumbly alabaster;
- 100 liters of warm water.
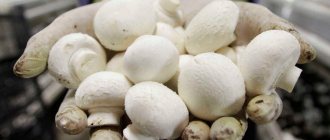
Approximate aging time is 23 days. The consistency of the finished product is loose and homogeneous, the color is dark brown. Feature: when squeezed in the palm of your hand, the mass should not stick together and release liquid.
Semi-synthetic
Horse breeding is not on a large scale. Consequently, it is impossible to find horse manure in the required quantity. The way out of the situation was the production of semi-synthetic composts for growing champignons.
An alternative technique includes several composition options (part of the waste product of horses is replaced with another material):
- horse manure - 50 kg, chicken manure - 15 kg, straw - 50 kg, gypsum - 3 kg, water - 200 l;
- horse waste - 50 kg, droppings - 75 kg, cereal stalks - 250 kg, construction gypsum - 15 kg, water - 250 l;
- straw type manure - 250 kg, dry chicken excrement - 75 kg, straw - 250 kg, gypsum - 15 kg, water - 1000 l.
Synthetic
This type of compost does not contain horse manure, which reduces the cost of material. The synthetic substrate contains straw, chicken manure and minerals (urea, ammonium sulfate, Superphosphate, etc.).
Standard step-by-step recipe:
- Fill 500 kg of straw with any slurry so that you get a slurry;
- after 3 days, add 250 kg of bird droppings and another 500 kg of straw;
- add urea (25 kg);
- enter Superphosphate (3.17 kg);
- on the first and third interruptions, add chalk (8 kg) and plaster (12 kg).
After 4 turnings, the compost is ready. This takes 25–27 days.
Composting process
Manipulations to prepare the basis for growing champignons are called composting. The main task is to saturate the substrate with nitrogen, potassium, phosphorus and calcium in a certain percentage ratio of 2/1.5/1.5/4, maintaining acidity not lower than 7.3 and not higher than 7.5 pH. At the same time, the humidity of the compost is no less important - its limits should not “step over” the thresholds of 64-70 percent. Let's dive into the process of preparing compost in more detail, not forgetting that compost is originally an organic fertilizer.
About compost on Wikipedia.
First of all, it is worth noting that the procedure we are considering requires precision and a lot of patience, since it is simply impossible to predict the result 100 percent. The specialist who takes up the substrate must be clearly aware of his actions and observe the proportions of substances added to the artificial soil. Any deviation can cause an unpredictable chemical reaction, as a result of which the soil will become unsuitable for the development of champignons. If mistakes were avoided, the “farmer’s” efforts will be rewarded with a generous harvest - successful plantations can produce up to 150 kilograms of mushrooms per 1 ton of substrate.
Let’s look at the basic steps, without following which you shouldn’t even start “constructing” a mushroom farm:
- First of all, preparatory work is carried out to organize the site - choosing a concrete site, designing a canopy, if it is not an enclosed space. It is fundamentally important to exclude any contact of the substrate with the ground or rainwater - this way the farm is protected from foreign microelements or pests getting into the compost. It would be nice if the site was equipped with sides.
- Once the location has been determined, you need to select a base - in our case it will be straw. It is on the basis of dry stalks of millet or rye that a very good substrate is obtained. A small nuance - there should be a lot of hay, at least 100 kilograms, from which approximately 250 kilograms of substrate will be obtained. With a more meager amount of plant raw materials, fermentation is unlikely, which means the goal will not be achieved.
- Once the raw materials are selected and ready for use, it is time to decide on natural fertilizer - litter or manure. Horse manure is considered the most suitable; if it is not possible to get it, cow manure will do. As a last resort, you can use bird droppings.
Further actions are the direct preparation of the nutritional “base” for the development of mushrooms. Read on if you are ready to “take the bull by the horns.”
Article on the topic - Spent champignon compost: the second life of mushroom compost.
Technology
The technological process of preparing a nutrient mixture includes many stages. It is equally important to consider the rules for preparing equipment, materials, tools and components. The result depends on this.
Necessary materials and equipment
To create optimal conditions, the compost should not come into contact with the soil. Select appropriate surfaces:
- concreted area;
- barrel;
- container, polyethylene bag;
- roofing felt
Auxiliary tools:
- watering can or hose;
- polyethylene film;
- pitchfork.
The technology involves the process of interruption. Will need;
- a lot of free space - at least 2 x 2 m (if there is no square area, try to keep the width 2 m, make the length arbitrary, but more than 2 m.
- a canopy over the composting site that will protect from direct sunlight and rain;
- free flow of air from all sides - wooden or alabaster sides with a height of 40–50 cm are created;
- The minimum air temperature is 10–12°C.
- container for soaking dry vegetation - cobs, hay, straw.
Preparing the Components
Compost materials must be of high quality. This means the following:
- straw, hay - without signs of rot or mold;
- manure is exclusively fresh.
The dry material is initially soaked with water in a separate container. Keep for 3 days. It is then crushed using a feed crusher.
The straw then goes through a disinfection process, as it contains fungi and other pathogens. Pasteurization process:
- After crushing the material, direct steam at it at a temperature of 65–70°C (a steam generator is used).
- Steam for 60–70 minutes.
Cooking steps
The ripening time of the compost mass depends on the speed of fermentation (the hotter it is outside, the faster the process occurs). Average indicators are 22–24 days. Organic fertilizer is formed in 3 stages:
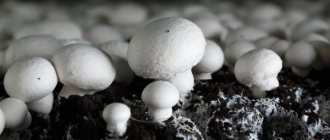
- Decomposition. Exposure to heat leads to the breakdown of substances, which promotes the formation of nutrient compounds that provide a favorable environment for the proliferation of necessary bacteria. Earthworms are also bred here (they speed up the fermentation process). This takes 5 days.
- Gumming. The period of humus formation requires powerful aeration. Without access to oxygen, the necessary bacteria die. It is necessary to mix the mass and monitor the flow of fresh air under the canopy.
- Mineralization. The final phase when all compost substances undergo decomposition. After this stage, the mycelium can be planted.
Standard cooking process:
- Lay the straw in a layer of up to 30–35 cm.
- Spread horse manure.
- Add bird droppings (only when dry).
- Wet the pile using a watering can or hose fitted with a spray nozzle.
- Compact it.
- Repeat the procedure 4-6 times.
When preparing compost, materials are stacked in layers. Divide each component into 4-6 piles ahead of time.
After laying the raw materials, ensure that the pile is heated to + 45°C, covering it with polyethylene. When the temperature inside reaches + 65... + 70°C, open the shelter, but make sure that the air is not cooler than +10°C.
Then proceed as follows:
- After a week, use a fork to break up the substrate and add gypsum / alabaster.
- On day 14, water (again with a spray), but so that the water does not stagnate. Stir.
- After 20 days, moisten again and beat with a pitchfork.
- On the last day, mix the mass and transfer it to the place where the champignons will be grown.
The correct composition of the substrate for growing mushrooms
Compost for champignons is made from mown hay (straw). Some gardeners prepare it from fallen leaves and plant waste from the garden. The main thing is that the raw materials are not rotten or infected with infections. Later, the used substrate becomes an excellent fertilizer for vegetable beds. The composition must contain:
- straw, dry leaves or grass (these will provide carbon nutrition);
- sources of organic nitrogen (fresh, unstagnant manure or chicken droppings);
- mineral additives (urea, chalk, bone meal, gypsum);
- bio-activators that contribute to the speedy preparation of the substrate.
In addition to the composition, experienced gardeners pay special attention to composting. At its core, it is a complex process of fermentation of microorganisms. The substrate needs a certain time to be ready for planting mycelium, so this issue needs to be addressed in advance.
The correct substrate for mushrooms must contain all the necessary vitamins and minerals
Fermentation accelerators
During composting, chemical processes occur that release steam, ammonia compounds, and carbon dioxide. The speed of fermentation is affected by weather conditions. If they are unfavorable, mushroom growers speed up the processing of organic matter using biological products.
There are a huge number of them: Baikal, Ekomik, Embiko, Vozrozhdenie, Kompostin, Siyanie, etc. Destructors are used in accordance with specific instructions.
When using accelerators, compost materials must be crushed as much as possible. Otherwise the action slows down.
If there is no opportunity or desire to buy a biological product, gardeners recommend using folk remedies:
- Herbal tincture. Take 5 parts of any grass (weeds will also work), 2 parts of chicken manure and 20 parts of water. Leave for 6–8 days.
- Urine. Mix human or animal urine with water in the following proportion: 1 part biological waste to 4 parts water.
- Yeast. Add 3 tbsp to 3 liters of warm water. l. dry yeast, 600 g sugar. Leave in a warm place to ferment for several hours.
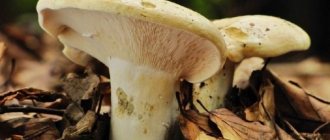
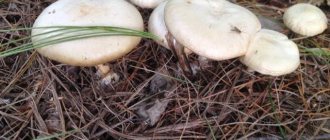
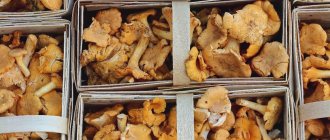
How to grow chanterelles at home?
Breeding chanterelles, like other mushrooms, is based on the basic rules of mushroom cultivation. Planting a mushroom next to a tree is done using a spore infusion, pieces of mycelium or seed material, with the assistance of a layer of forest soil. The composition of forest soil is rich and nutritious, and the upper humus layer is responsible for the development of mycelium. The bulk of the soil is rich in microelements and organic compounds; it also contains fungal spores, from which fruits then grow. Therefore, when growing chanterelles on your site and preparing myceliums for planting, choose a place where their main population is concentrated, cut off the mushrooms, carefully remove the mycelium and, together with the soil, transfer it to your site.
The removal of forest soil should be carried out near trees; the optimal time for harvesting is considered to be the beginning of autumn or early spring. Layers of soil at least 20 centimeters thick are dug out. In the area where the soil is infested with chanterelles, the bottom layer of forest soil is used. The organization of a mushroom mini-farm should take place in a cool, shaded place, among trees. We bury the mycelium in the ground and sprinkle it with chopped straw. Maintain proper humidity.
If you previously noticed a place where a lot of chanterelles grow, mark this place. However, the absence of mushrooms cannot guarantee that the mycelium is dead, it is simply possible that the season was less fruitful; the main criterion should be that the mushrooms were previously noticed in this place. Fungal spores remain in the soil for a long time and are not afraid of bad weather and suppression of fruiting. They continue to exist remarkably well, using a minimum of nutrients, taking advantage of their protection.
In order for forest soil to serve as good soil for a future mushroom farm, it must undergo a certain stage of preliminary preparation. This preparation method will improve the quality of forest soil. To properly prepare forest soil, it is packaged in plastic bags and dried in a cold room, the main thing is to leave oxygen access to the soil. The soil can be stored in such conditions for up to a year, without harming fungal spores, but pathogenic microorganisms will die without moisture. As a result of this kind of training, the mushroom spores will get used to drought conditions and become more resilient.
It is better to plant chanterelles on the site in early spring; increased humidity and warm weather will contribute to better implantation of the mycelium into the soil and its further development. Previously harvested forest soil must be mixed with garden soil in a 1:1 ratio, pour the soil mixture into the prepared depressions, add mycelium or a prepared chanterelle solution there, and cover it with fine straw or rotted leaves on top to protect the mushroom bed from drying out.
Watering must be organized in such a way as not to harm the mycelium; it is better to water in small portions, slightly moistening the soil, because water stagnation should not be allowed. The mycelium can simply die from excess moisture as a result of rotting.
Chanterelle has not yet become widespread, although it has an excellent taste and contains quite a few useful substances. Only a few mushroom gardeners grow chanterelles on their plots. However, it is quite possible that chanterelles will soon prove themselves and the mushroom industry will turn its attention to these mushrooms. And we can all be content with tasty and healthy mushrooms that can even treat gastrointestinal diseases.
How to use compost?
Experienced mushroom growers build special piles - compartments for compost. To make it, just dig a hole (any depth - from 10 cm), fill it with concrete, installing sides made of wooden boards. The height of the fence depends on the amount of materials - the more there are, the higher the structure.
Compost is transferred to this structure, but the substrate can be made directly in piles. Their size depends on the volume of products grown.
After harvesting, gardeners do not throw away compost, even after using it three times. The waste material produces mushroom blocks that are rich in nitrogen and other minerals. They are used:
- as fertilizing for different crops;
- for mulching plants - saturates them with useful substances, retains moisture, protects them from diseases and pests;
- as a way to insulate the soil when planting young trees.
Growing in a suburban area
Many people wonder how to grow mushrooms in the country if nothing is prepared for this. The easiest way would be to equip a small place on the windowsill; this will be enough for a small amount of mushrooms, which can then be planted in a full-fledged greenhouse on the site.
The advantage of growing in the country is that there is more space that can be used for growing crops. However, it is necessary to understand that this will also require additional costs, and possibly the installation of a canopy for those crops that love shaded areas of soil.
Another advantage is the colossal harvest, which can be sold and get an excellent increase in the family budget. Grown mushrooms can also be used for yourself, up
Having considered the question of how to grow a mushroom on a plot, it becomes clear that in general the procedure is no different from growing vegetables. The exception is that there is no need to create seedlings and subsequently replant them in open ground.
However, selecting a substrate is a little more difficult, because not every region has suitable soil for rarer varieties of mushrooms.
- Honey mushrooms, oyster mushrooms and champignons can grow in virtually any conditions, but they will affect their taste.
- Ideally, it is recommended to initially hone your growing skills on simpler species; this will allow you to gain the necessary knowledge and experience that will help in cultivating more complex and labor-intensive species.
- The growing period depends entirely on the specific species and the conditions in which it is kept, so it must be calculated independently, taking into account all the factors and nuances.
Useful Tricks
Champignons are not considered too capricious crops. But the quality of the compost depends on the yield and taste of the original product. For this reason, you must strictly adhere to the rules for creating a mixture for growing mushrooms.
Experienced mushroom growers recommend adhering to the following tricks:
- do not allow the content of minerals and other microelements in the compost to exceed the norm - this exceeds the temperature of the substrate, which leads to the death of the champignons;
- compost humidity should not exceed 70%;
- a good product does not have an ammonia smell;
- normal structure - loose;
- do not plant mushrooms in the fertilizer if water flows from it;
- Monitor the temperature in the piles.
Champignons have become an affordable product in stores. But mushrooms grown in mass production do not have a pronounced taste and smell. “Homemade” champignons grow on compost made from natural ingredients. Rich nutrition allows you to get a good harvest of real mushrooms.
0
0
Copy link
Planting mycelium
Planting the mycelium
The finished substrate is placed on the platform. If mushrooms are grown in bags, then 10–15 kg of compost should be placed in them, and the layer should be up to 40 cm. After laying, the compost is slightly springy. After settling, the mycelium can be planted. But before this, you must measure the temperature inside the substrate; it should be 25–30 °C, otherwise the mycelium will disappear.
Mycelium can be grain or compost. Growing champignons at home requires the use of compost mycelium (it is more resistant to external influences); grain mycelium is suitable for factory conditions. When planting, the mycelium is evenly spread over the surface of the compost, then, stirring, it is deepened by 5 cm. A little mycelium is scattered over the surface of the substrate. Sowing rate: 300–500 g/1 m2.
Growing champignons always requires a slightly moist substrate; for this you can use newsprint. They soak it and cover it with compost. As the mycelium grows, which is about two weeks, a layer of covering mixture is laid out on the compost.
How to choose the right place?
It is important to choose a shaded area for growing. Lowlands near fences are excellent for oyster mushrooms and champignons. The space near deciduous/coniferous trees is suitable for wild mushrooms. It is worth knowing that mycelium does not develop near fruit trees , and the proximity of mushrooms to garden plants is also contraindicated.
Before planting planting material, you need to perform a soil analysis. It is important that its acidity and composition be approximately the same as that of forest soil. After this, the top layer of soil is prepared for cultivation.
Note ! Near the trees, the top layer of earth is removed to a depth corresponding to the height of a bayonet shovel (70 cm from the trunk). The bottom is covered with a substrate of peat soil, sawdust and leaves (in equal proportions).
You can also transfer soil from the forest to the site, collected in the place where you noticed a mushroom clearing.
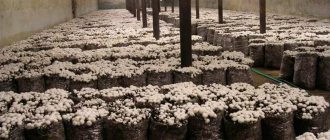
Growing in the basement
When grown in the basement, mushrooms such as shiitake and oyster mushrooms can produce crops year-round. After all, in basements the air has a constant temperature, there is also ventilation and twilight, which are necessary for mushrooms.
Note ! Initially, the basement needs to be divided into 2 parts: mushrooms will grow in one part, and ripen in the other. The thing is that these processes require different temperature conditions.
Sowing is carried out in the same PET bags. An incision is made on the side of each bag for the mycelium. Initially, the temperature should be within +22-25 degrees, later it is lowered to +12-18 degrees.
Mushroom varieties also matter:
- moderate humidity - for champignons;
- high humidity – for shiitake and oyster mushrooms;
- Honey mushrooms grow quite poorly in bags; it is better to use wood.
FAQ. Answers on questions
How to choose a place to grow?
It is important to choose a shaded area for growing. Lowlands near fences are excellent for oyster mushrooms and champignons. The space near deciduous/coniferous trees is suitable for wild mushrooms. It is worth knowing that mycelium does not develop near fruit trees, and the proximity of mushrooms to garden plants is also contraindicated.
How to grow oyster mushrooms?
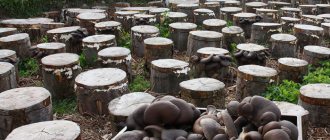
They can be grown in beds using a special substrate, or on the stumps of deciduous trees. Care consists mainly of regular watering.
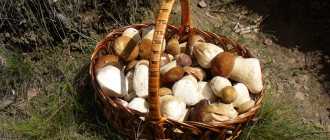
How to grow porcini mushrooms?
They can be grown under trees that grow in the country (spruce, beech, oak, birch). It is best to move the mycelium to an area from the forest. But it is important that the type of wood in the dacha and in the forest matches.
How to grow champignons?
Shaded areas of the garden are prepared for mushroom beds - they are filled with compost with mushroom mycelium. Champignons need to be constantly watered and protected from temperature changes.
Why are trees replanted?
This is the most labor-intensive and time-consuming way to grow mushrooms. Young trees, next to which the required mushrooms grew, are transplanted from the forest to the site. In this case, patience will be required, because to get a harvest, you need to wait quite a long time. But thanks to this difficult method, you can grow the most complex mushrooms - for example, butterfly, which bears fruit from May to September.
Oyster mushroom - a delicacy accessible to everyone
From the forest to the freezer: how to properly freeze mushrooms for the winter
Yellow-brown oiler - a mushroom from coniferous forests
White fly agaric is a deadly poisonous mushroom
The goat mushroom is inconspicuous, but it’s delicious
Common oakberry - excellent taste
Satanic mushroom - controversially poisonous mushroom
Polish mushroom - a “delicacy” from coniferous forests
As a result, we note that mushrooms grown with your own hands are healthier and tastier than store-bought ones. They are suitable not only for cooking, but also for sale (albeit in small quantities).
Growing oyster mushrooms intensively
To grow oyster mushrooms you do not need to be a great specialist; it is important to follow simple instructions.
Buying mycelium
Oyster mushroom mycelia are sold to companies that grow mushrooms on an industrial scale. Online stores also have mushroom mycelium; they send orders by mail.
To try your hand, you can first buy just 1 kg of mycelium. This amount is enough to get 3 kg of oyster mushrooms. The purchased mycelium can be stored in the refrigerator at a temperature of +2-3°C.
Substrate preparation
To grow oyster mushrooms, you need to prepare a substrate using barley or wheat straw, corn cobs, chopped corn stalks, and sunflower husks. Raw materials should not be affected by mold. You will need to take 10 kg of raw materials and grind them. The resulting fractions should not exceed 4 cm.
For disinfection purposes, the substrate will have to be subjected to heat treatment - boiled for 2 hours.
At the end of the procedure, you need to drain the water and cool the contents of the vat to a temperature of +25-26°C. The substrate must not be allowed to become waterlogged. It's easy to check - you just need to take the substrate in your hand and clench your fist. If the water does not flow, and only a couple of drops are noticeable, it means that the substrate is prepared correctly.
Planting mycelium in plastic bags
In each bag, previously disinfected in bleach, you need to place 5 kg of substrate alternating with mycelium. After preparing the mushroom blocks, you will need to tie the neck and perforate. It is necessary to cut 1 cm holes on the surface of the bags. It is advisable to arrange the slots in a checkerboard pattern, at a distance of 10-12 cm from each other.
Incubation period
The duration of the incubation period is 10-14 days. at this time, the mushroom blocks are in a room specially designated for growing oyster mushrooms. For 2 weeks, you will have to regularly ventilate the plantings, exclude access to flies, and maintain the temperature at +18-21°C.
Attention!
Don't be afraid. In the first days, the substrate in the bag will heat up, however, a temperature of +30°C is detrimental to the mycelium. Therefore, you need to ventilate the room more often to prevent the substrate from burning. A fan can be used.
At this time, mushroom blocks do not need additional lighting. After 3 days, white threads will begin to break through the thickness of the prepared mixture, and after 10 days the entire substrate will be permeated with them, and the smell of mushrooms will appear.
Care during ripening of fruiting bodies
It is interesting to observe when oyster mushrooms begin to bear fruit. But, to obtain a harvest, a number of conditions will need to be met:
- Reduce the room temperature to +10-13°C.
- Organize additional lighting for 8-9 hours with fluorescent lamps with white (daylight) light.
- Increase air humidity to 90-93%.
- It is necessary to ventilate the room in which the mushroom blocks are located 4 times a day.
To maintain the required humidity, you can spray the walls, being careful not to get on the fertile mixture with mycelium. Having created favorable conditions, fruiting bodies will appear through the slits. The wave of fruiting lasts approximately 2 weeks.
Towards the end of the wave, the caps rapidly increase in size. Harvesting is done by twisting the fruiting bodies, trying not to damage the mycelium.
After harvesting the first crop, you need to ventilate the room and wait for the second wave, which will arrive in 14 days. The first 2 waves are the most productive, the next 2 give less results.
After collecting 4 waves of harvest, the mushroom blocks are replaced with new ones, and the used ones can be used as fertilizer.