How to grow oyster mushrooms in bags
Independent home production is convenient because a stable harvest can be obtained regardless of the weather or time of year. Knowing the characteristics of mushroom growth in bags, it is possible to plan the harvest by the required date.
Growing oyster mushrooms at home is a labor-intensive but not complicated process. To obtain homemade mushrooms you will need a small room, a set of simple equipment and knowledge of several growing principles.
Preparing the premises
For home production of oyster mushrooms in bags, any premises where it is possible to create an appropriate microclimate are suitable. This could be a cellar, basement, veranda, pantry or extension. An important principle for successfully growing oyster mushrooms in bags at home is maintaining sterility.
For disinfection, you will need a solution of ordinary lime (4%). The composition is applied to the walls, ceiling, floor and the room is closed for 24 hours. Then ventilate the room until the smell disappears completely and all surfaces dry.
Growing oyster mushrooms at home in bags requires high humidity and constant temperature. It is necessary to ensure a flow of fresh air and light. If there is no access to the sun, artificial lighting will be sufficient.
Necessary equipment
For cold rooms when growing in bags, it is worth purchasing a heating device and additionally insulating the walls and floor. To control the constancy of the microclimate, you will need a thermometer.
Direct sunlight is harmful to oyster mushrooms. When growing mushrooms in bags at home, it is enough to equip the room with fluorescent lamps.
Conventional spray bottles are often used to maintain humidity. When producing oyster mushrooms at home for sale, modern air humidifiers are used, based on steam generation or fine spraying of water.
For ventilation when growing in bags, you can equip supply and exhaust ventilation. In a small home room, a household fan will do the job perfectly.
Selection of bags
For home cultivation of oyster mushrooms, choose translucent plastic bags with a wall thickness of about 70 microns. Particular attention should be paid to the strength of the bags if you decide to hang them on supports.
The size of the bags depends on specific home conditions and may vary. The most convenient for home growing are bags from 40*60 cm to 50*100, with a minimum capacity of about 5 kg.
Buying mycelium
Seed material (mycelium) is purchased at garden centers or at enterprises that grow oyster mushrooms. Using the industrial method, the mycelium is used for no more than 12 months and then sold. It can bear fruit for a long time at home.
Important! High-quality mycelium for growing in bags from the store is yellow or orange in color, without dark inclusions or spots.
The mycelium, from purchase to use, must be stored in the refrigerator. Before planting, it is kept at room temperature for at least a day. Knead without breaking the packaging and send it to a room prepared for growing at home. This gradual warming protects the material from temperature shock.
Substrate for planting
You can find store-bought ready-made substrate for growing different types of mushrooms. Preparing the mixture at home is no less effective; oyster mushrooms in bags will be more profitable, and their production will be significantly cheaper.
Suitable raw materials:
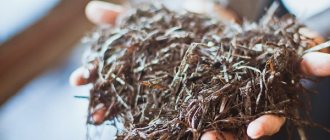
- Wheat or barley straw is considered the best substrate for oyster mushrooms.
- Buckwheat hulls or sunflower seed husks will require minimal heat treatment.
- Corn stalks and cobs should be chopped before packaging into bags.
To grow oyster mushrooms on sawdust in bags, it is recommended to use only hardwood. Mycelium does not grow well on coniferous wood with a large amount of resin.
Comment! Sawdust that is too small cakes and does not allow the oyster mushroom mycelium to grow freely. It is recommended to mix such a substrate with larger fractions.
You can create a mixture of these components in any proportions when growing in bags. The exception is sawdust. When using chopped wood at home, impurities should not be more than 3% by weight.
Preliminary preparation of the substrate when growing in bags:
- steaming in water with an initial temperature of about 70 °C for 5 to 6 hours (for husks and husks);
- if possible, boil the mixture for about 2 hours (for straw and sawdust);
- squeezing the substrate to a state where water does not flow, but slightly oozes through clenched fingers (about 75% humidity);
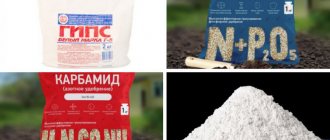
- it is useful to enrich the home mixture with urea and superphosphate, taking no more than 0.5% of each fertilizer;
- limestone and crushed gypsum are mixed at the rate of 2% of the total mass.
If you purchase the mixture for bags ready-made, be sure to read the directions on the package. Homemade oyster mushrooms, honey mushrooms, and champignons require different compositions.
Forming mushroom blocks
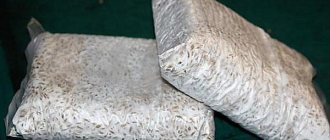
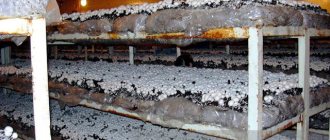
Oyster mushrooms in bags are grown in the form of blocks that replace beds. The bags are filled according to certain rules, which speeds up the growing season and increases the home harvest.
Principles for forming blocks at home:
- The bags are filled with substrate and seed material in layers. The nutrient mixture is laid first (about 5 cm), and the mycelium is thinly distributed on it. The layers alternate and the substrate is left on top.
- For 1 kg of mixture when grown in bags, up to 60 g of mycelium is used. For a bag with a capacity of 10 liters, at least 200 g of mycelium are consumed.
- Oyster mushroom mycelium in bags is distributed so that most of it (up to 80%) is near the walls; the remaining amount is added to the center.
- Laying should not be loose: per 1 liter of volume - 0.5 kg of mixture.
- The bags, 2/3 full, are tied tightly and small holes (up to 2 cm) are cut, placing them every 10 cm.
Important! The rate of mycelium germination at home depends on the number of layers. The more mycelium, the faster it ripens.
Pet food
It is not realistic to use the waste from oyster mushrooms as food.
If the mixture is straw, then of course you can try it. There are authors who claim that such waste contains a lot of protein.
But we must take into account that this is a mushroom protein and in order for animals to eat such food, they must be accustomed to it from childhood. In any case, this mixture should take up no more than 10% of the diet and be completely white, without traces of green or black mold, and without signs of rotting.
Will chickens eat the waste? Most likely, yes, they love to clean up trash. Perhaps they will find larvae, the remains of grains, some pebbles. But it is impossible to consider the spent substrate as significant in the bird’s diet.
How to care for oyster mushrooms in bags
The formed blocks are stored without access to light; the mycelium matures at a constant temperature from +18 to +23 °C. The incubation period accelerates if the room is not ventilated. There is no need to water the ripening blocks. In 10–14 days, the mycelium grows, the contents of the bags become white, and a characteristic mushroom smell appears.
Home incubation of oyster mushrooms is completed three weeks after planting. The room can be ventilated or the blocks can be moved to another location. Sprouted oyster mushrooms in bags will require certain humidity, temperature and lighting.
Temperature and humidity
The permissible temperature range for growing oyster mushrooms is quite wide: from 16 to 30 °C. It is important to maintain the initial conditions at the same level throughout the entire period. Allowable fluctuations are no more than 2 °C, otherwise the crop may die.
Comment! The color of oyster mushrooms depends on the growing temperature: at +20 °C the caps are light, at +30 °C they are much darker.
Humidity when growing at home should not fall below 50%. Optimal indicators for rapid growth of oyster mushrooms are from 70 to 95%.
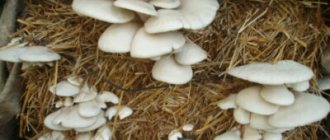
The appearance of seedlings is indicated by bumps on the bags that form next to the holes. Young oyster mushrooms collected in clusters are called mordia by mushroom growers. With their appearance, intensive irrigation of the bags begins.
How to water oyster mushrooms in bags
When grown in bags, mushrooms do not require watering with a substrate for active growth. In home nurseries, the goal is to create a very humid microclimate. The muzzles emerging from the bags are capable of increasing to removable sizes in a matter of days. Moist air is sufficient for this.
Watering oyster mushrooms in bags is done twice a day. Packages with substrate, floors and walls are sprayed manually, or special units are used. You can install open containers of water near heating devices. Small home production can do without special humidifiers.
Important! The room where oyster mushrooms are grown is constantly filled with many fungal spores - the strongest allergens. Wear a mask and safety glasses while working.
What are oyster mushrooms and what are the ways to grow them?
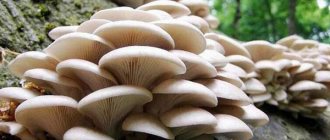
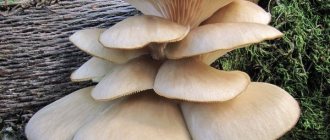
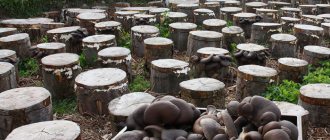
In nature, this mushroom grows on old damp stumps and loves moisture and shade, so by creating the same conditions in the basement at home or in the country, we will be able to harvest several harvests a year.
It is not necessary to grow it only in natural habitats. To grow oyster mushrooms, you can create optimal conditions at home.
There are 2 types of growing oyster mushrooms:
- Extensive is when mushrooms are grown in natural habitats.
- Intensive - when they are grown under artificial conditions, that is, in special rooms equipped with everything necessary to maintain the correct microclimate.
Both methods have their advantages and disadvantages. The disadvantage of the extensive method is its complete dependence on the weather, as well as seasonality; the disadvantage of the intensive method is the need to invest in the purchase of mycelium, special equipment for arranging a room with the necessary microclimate and other costs that are necessary to ensure the correct conditions for growing mushrooms.
If we talk about the advantages of both methods, the advantage of the first (extensive) is the minimum costs, the advantage of the second (intensive) is getting a harvest at any time of the year, and, accordingly, the opportunity to earn money from sales, regardless of the season.
Oyster mushrooms prefer to grow in well-ventilated and bright rooms. The following is used as a substrate on which mushrooms can grow fertilely:
- Agricultural waste (chopped cobs, cereal straw, corn stalks, husks, sunflower husks);
- Wood processing waste (paper, sawdust, tree bark, shavings);
- Sugarcane waste and many other substrates containing lignin and cellulose.
In addition, from the point of view of profitability and ease of cultivation, there is a peculiarity of the growth of oyster mushrooms - the mushroom grows in druses, which allows you to literally harvest with one wave of your hand.
So, where to start growing fresh mushrooms at home and how, if desired, to put them into production?
How to cut oyster mushrooms from a bag
Mordia are formed near the holes. To allow them to grow freely, the cuts on the bags are widened. Most often, homemade oyster mushrooms are ready for harvest in 5–7 days.
Thus, the first harvest can be obtained 40–45 days after planting. It will account for 70% of the total fertility of the block. The next wave of oyster mushrooms will be ready for harvest in 14 days (about 20%). The third harvest per bag (10%) is expected in two weeks.
In order to obtain oyster mushrooms without loss, they must be removed from the bags correctly without damaging the mycelium. Features of the collection:
- oyster mushrooms are cut with a sharp knife with a thin blade (a stationery knife will do);
- mushrooms are removed in clusters, which extends the period of home storage;
- Several young oyster mushrooms are left from each family to prolong the growing season.
The amount of home harvest directly depends on the volume of the package. From a bag weighing 10 kg you get about 3 kg of oyster mushrooms.
Storing oyster mushrooms
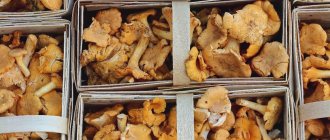
If the mushrooms are not used immediately, they will require storage containers. It is best to use plastic containers, packing up to 1000 g each.
Shelf life of homemade oyster mushrooms at different temperatures:
- in room conditions without cooling – up to 24 hours;
- oyster mushrooms remain in the refrigerator at +5 °C for 4 days;
- temperature -2 °C increases shelf life up to 20 days;
- freezing preserves oyster mushrooms for six months;
- deep freezing (-18 °C) – for a year.
Before storing, it is not recommended to moisten homemade oyster mushrooms, otherwise they will absorb water and quickly lose their shape and consistency.
“Second life” of mushroom compost
As we noted earlier, there are many who believe that used compost is an excellent fertilizer for country or garden plantings. People who have already tried recycled materials on their property unanimously say that the harvest of vegetables and fruit trees has increased significantly, becoming qualitatively larger after they spread the compost on the surface and then dug up the soil. The reason for this is the high nutrient content of the fertilizer. As for the cold season, mushroom compost can replace mulching as a kind of air conditioner and builder of healthy earth microflora.
But there will always be at least one “unbeliever Thomas” who will not only not want to try the method, but will also instill a huge stone of doubt in your soul. Whether to learn from the experience of compatriots is a personal decision for everyone. But let us give you a little advice - allocate a tiny plot of land on your farm and still try mushroom compost in action, perhaps you will be pleasantly surprised by the result and open a “gold mine” for your own business.
Difficulties in growing
Following the rules does not always guarantee a bountiful harvest of oyster mushrooms. The main enemy of home plantations is damage by mold, mildew, and fruit midges. The main cause of infections is an infected block or its overwatering.
If any disease is detected, the bag is completely thrown away, the room is washed, cleaned, and disinfected. You can treat all surfaces with a sulfate solution, and then whitewash the walls and ceiling with copper sulfate added to the lime.
If there is insufficient ventilation or waterlogging of the unit, fruit flies may appear inside. Then the bags are removed, and the cleaned room is fumigated with a sulfur smoke bomb.
Warning! If an infected bunch is found with spots, pits, softening, or darkening of the stems, the entire block is thrown away. The substrate is not reused.
If the block does not bear fruit, and searching through the bag did not reveal any diseases, the reason for the lack of harvest may be poor-quality planting material.
How to grow oyster mushroom mycelium yourself
The lack of germination can be detected only after several weeks of labor and expense. Therefore, experienced mushroom growers try to grow their own, homemade mycelium. It is usually produced by specialized laboratories, but all steps can be repeated in a regular kitchen.
The easiest way to grow mycelium is on cereal crops. Pre-crushed grains are boiled for 15 minutes. All surfaces, vessels, and devices are treated with alcohol for disinfection. You need to work with gloves.
Home production is divided into three stages:
- Uterine mycelium. Produced in a test tube with crushed grains, adding pieces of oyster mushroom taken close to the cap. Fungus samples are dipped in hydrogen peroxide, added to a nutrient medium, and hermetically sealed. After 14 days, at room temperature, a white edge will appear - royal mycelium.
- Intermediate mycelium. It is grown on grains with the addition of chalk and gypsum (2 tablespoons of each additive per 1 kg of cereals). The jars are filled to 2/3 of the volume with the nutrient composition and a mother culture is added. The vessels are tightly sealed and left for 2 weeks. During this time, the jar of grains will be filled with fresh edging.
- Seed material. The substrate is disinfected as standard and placed in sterile containers. The intermediate mycelium is added to the mixture. They wait until it is completely overgrown with white edges. Now the home mycelium is ready to be placed in bags for growing oyster mushrooms.
Mycelium is capable of germinating at any stage of production. But it is precisely compliance with the full cycle that provides a large amount of cheap, high-quality planting material.
