Paper flowers look as beautiful as real ones. Why not make a paper bell with your own hands? If you put in a little diligence, you can make wonderful flowers, panels, cards or appliqués that will serve as a wonderful gift for a birthday, spring holiday or decoration of the New Year tree.
- Corrugated paper bells
- Big bells
- Bells made using quilling technique
- Panel with bells
- Origami bells in a basket
- How to make a bell from a sheet of paper
- Applique flowers-bells
- Cardboard bells
- Bells decorated using scrapbooking technique
- Paper bell hat
The grace and noble modesty of the flower makes it a decoration for any interior.
What do you need to take?
Unforgettable radiant bell flowers can be prepared from scrap materials. To do this you need to take some materials:
- a square sheet of blue or purple paper, you can take white,
- green sheet of paper,
- material for stamens and stems,
- green wire.
A photo of a paper bell can be taken from the Internet. First you need to lay down the base color as a base. This rather complex shape is obtained by folding simpler base pieces. First, a double square is made, then a bud, and the result is a “frog” shape.
Origami flower
To create one bell you need to prepare:
- sheets of double-sided paper in three colors: white, blue, green;
- scissors;
- glue.
Origami patterns:
The process of performing origami. On a flat table surface, place a blue worksheet, cut into a square with 18 cm sides.
The sheet must be folded in half along the vertical axis, pressed lightly and returned to its original position.
Turning the sheet over to the other side, fold it diagonally and press lightly again and return to its original position.
The finished sheet with folds must be folded into a double square; to do this, the sheet must be folded so that the center of the square is the center of the sheet.
The resulting double square must be placed on the work surface with the ends up. The upper triangle straightens into a square.
The resulting figure must be turned over so that the straightened square in the form of two triangles folded together is completely in front of the eyes.
The next manipulation consists of re-arranging the triangle, only this time on the left side.
The corner is straightened into a square, after which the side corners of both sides of the triangles are folded to the middle and returned back.
There are already fold lines in the center of the triangles, which will make it easy to bend from the current side of the triangle to the bend of the next triangle.
The action described in paragraph 9 is repeated for all subsequent sectors.
According to the diagram below, you need to consider the dotted lines. These lines will serve as the fold lines that should be made.
The corners that appear as a result of bending should be bent and pulled upward with the corners. This action is repeated for all resulting triangles.
All sectors created for the future bell must be moved in opposite directions from the center. As it shown on the picture.
- The piece of paper collected in a triangle must be unfolded.
- According to the figure below, bend the corner along the already made inflection lines.
The resulting angle should be bent towards the center of the sheet inwards. Repeat this action for each corner of the bell.
As a result of the described action at step 16, the inner square should straighten itself. All sides of the triangle gradually move towards the opposite side from the center.
- The petals of the resulting flower must be curled with any rounded object, such as a pencil.
To make the flower original, the stamens must be placed in the center. The stamens are made of white paper, cut into short strips and glued into the core.
In addition to the flower and stamens, it is necessary to make a stem with leaves. The stem and leaves are cut out of green paper. A cut out green rectangle is screwed onto a small round object, such as a pencil, and sealed in this position. The leaves are glued to the stem with glue. To create a bouquet, such bells should be repeated several times.
A beautiful, affordable and durable flower is ready.
Video on the topic of the article
Source: https://DekorMyHome.ru/rukodelie/kolokolchik-iz-bymagi-svoimi-rykami-podborka-shablonov-s-video.html
How the “frog” shape is formed
How to make a bell out of paper? - this is a simple question from those who are not afraid to create.
To fold the frog shape, you need to do step by step steps. You need to take a square of paper and fold it in half, both on one side and the other, then combine the opposite shapes of the square. The result is folds.
Then you should turn the sheet over with the wrong side and fold it diagonally, you need to align the corners. The following structures are obtained.
Stencils for paper windows for the New Year 2022 to print. Templates and pictures for cutting
Good evening!
Winter is in full swing and everyone has started to decorate their windows. You walk down the street and are amazed at how beautifully people came up with the idea of decorating glass with paper. So many ideas pop into my head at once. You open your laptop with the Internet, and there are even more of them, well, just go straight out and print out the stencils you find and glue them faster.
Actually, that's what I did. I cut out snowflakes with the children, made crafts, toys for the Christmas tree, and even memorized rhymes with them. We are preparing, so to speak, for the upcoming holidays. And now it’s the turn of our apartment.
We decided that we would definitely cut out the main symbol of the year with our own hands, this is a mouse (rat), then the numbers 2022 and, of course, fairy-tale characters. Let it be Father Frost and Snow Maiden, their friends Snowman, forest dwellers, houses, etc. After all, it is so colorful, and also fashionable!
Now a few words about the process of cutting out little ones or protruding pieces. Initially, you will need to print any template you like or draw any composition on a white A4 or A3 sheet. And how to do it? From this article, first copy the picture by right-clicking on it.
- Next, select Save picture as..., or simply click on Copy picture, then open the Word program (microsoft word) and paste this stencil into it (right-click again and select Paste).
Next Steps
Now you need to place a closed figure with the angle up and push it in the side corners. The outlines of small squares will appear. Next, you need to put the side corners of small squares together. This created a base called a “double square”.
Next, you should place the resulting figure with the open side down. Then both the left and right corners are bent towards the core and the sides are aligned, all along the central axis of the square. You get two triangles, which are made up of two layers of paper base.
Now you should open the right triangle and flatten it along the pre-made folds. Bend the left side of the triangle to the right side, open the left triangle, now a double one.
The following actions
Then you need to turn the folded figure towards you with the side that looks like an artificial kite and connect the right corner of the “kite” with the corner that is on the right. The rhombus between them needs to be folded in half.
A fold is formed after folding the diamond in half. It needs to be bent to the side. Now you need to take the figure by the tops of the “kite”, and bend its upper part inward and straighten it. The result is two bell leaves. Now you need to further bend the petals in the same way to get a bud.
Quilling method
When using this technique, New Year's toys
They are guaranteed to be original, but they take much more time to produce. There are several ways to arrange rolled paper strips:
Flat
In the upper part of the craft, two round serpentines are used, the rest of the body is constructed from elongated drop-shaped rolls, as in the lower figure.
Volume
For this craft you will need a long roll of very tightly rolled ribbon. The formation of a bell from it occurs in stages:
- a pendant thread or decorative cord is passed through the central hole
- the thumb is pressed into the bobbin in a smooth motion
- an umbrella is formed, then a dome with a thickening at the bottom
- the inner surface is treated with glue to fix the resulting shape and the pendant thread
- after drying, decoupage is applied to the outer part
- a bead “tongue” of the bell is attached to the bottom of the ribbon/thread
Combined
When mixing the two previous technologies, a unique craft is obtained. Drops and standard round bobbins of serpentine are glued to each other on a workpiece of the desired shape. After the glue has dried, the structure is removed from the template and hung on a ribbon.
Using origami technology
Using the glueless method, corrugated paper bells can be folded using the origami method.
To do this you need to use the following diagram:
These crafts look best in pairs, connected with textile tape.
bluebell branch
It is possible to assemble a whole branch of a bell from individual buds. Templates for paper bells can be varied and can be found online. You can train on a sheet of paper measuring, for example, 10 by 10 centimeters.
To make the buds larger and look like real ones, sheets of paper can be taken in other sizes. Both large and small flowers look good on a branch formed from wire with bell leaves.
Note!
How to make a rose from paper - the best ideas for DIY crafts + master classes on creating a rose from paper (160 photos)- Craft letter - TOP 120 photo reviews of craft letter. Simple diagrams + step-by-step DIY instructions
Crafts made from nut shells: the best step-by-step master classes on creating DIY crafts with photo examples of finished works
Beautiful symbol of the New Year
The custom of decorating a home with bells came to us from Europe. There was a superstition that their ringing could scare away evil spirits. To prevent dark forces from interfering with New Year's celebrations, bells were hung on the Christmas tree along with other toys. This tradition has taken root well all over the world. And today even people who are far from superstitious decorate their houses with bells for the New Year and Christmas. Because this is a very beautiful holiday souvenir.
In those distant times, people made huge bells from bronze. They were used not only as a talisman , but also as a signaling instrument. The bell notified the population about various events or called for a meeting. Nowadays this signal is used in educational institutions. Every September 1st the first bell rings, and before the summer holidays we hear the last school bell. So you can safely consider the bell as a symbol of the beginning of another year.
A completely different bell...
A school bell made of paper is also an attribute of the New Year holiday. You can make it for a Christmas tree, for a spruce wreath for a door, hang it on the door just like that, or bring it to school for decoration.
You can make it from disposable paper cups, by quilling, from disposable plates, from cardboard or paper. You can also master papier-mâché for this.
How to use the cups?
Disposable cups make wonderful school bells or bells for the Christmas tree. You need to take the starting material, punch a hole in the bottom with an awl, and thread a rope through it.
Next, you should paint the bells with various colors, for example, gouache paints. Multi-colored bells will look great!
How to add volume?
If you want to make an artificial three-dimensional bell out of paper, you need to take slightly different materials.
You need to take:
- thick white paper (cardboard),
- bright wrapping paper
- saucer or plate
- thread and needle,
- two beads of sufficiently large size,
- plasticine,
- markers,
- glue.
You will also need a simple pencil and a ruler.
Note!
- Mushroom craft - reviews of ready-made DIY crafts + step-by-step instructions and diagrams for children (180 photos)
Crafts from toilet rolls: step-by-step instructions for creating crafts. Master classes with simple work schemes (140 photos)
Crafts from corrugated paper - step-by-step master classes on how to create crafts from corrugated paper with your own hands + photo diagrams
Master class on creating a bouquet
We create flower blanks: cut out long strips of beautiful colored corrugated paper. We trim one edge using curly scissors - we cut the other evenly. One flower will require three blanks of petals and two leaves. We attach the candy with tape to the skewer.
We wrap three parts of the blank around the candies, securing everything with thread or glue. We lift the lower edges of the petals, stretch the edges a little and glue them to the bottom layer on the sides so that everything sticks perfectly. We wrap the skewer with a special tape and glue the leaves. We collect all the flowers in a bouquet, wrap it in a gift net, and tie our own bow using a ribbon.
Stages of work
First you need to place the saucer on a sheet of cardboard and trace this place with a pencil. Then cut out the resulting circle and glue wrapping paper to it. When the glue dries, you need to cut the circle again.
You need to place the blank in front of you so that the colored side faces down. Using a ruler, draw a pencil line through the middle of the circle, and then cut in half along this line.
One of the semicircles needs to be rolled up and the outer and inner edges glued together. The same should be done with the other semicircle.
Then a piece of thread is measured, which should be 2 times longer than the height of the bell. You need to string one of the beads on a thread and tie the ends of the thread together.
The thread with the bead should not slip out of the bell, so it needs to be secured. You need to grab the top loop and pull it up so that the bead is 1 centimeter above the edge of the bell. Then a piece of plasticine needs to be attached from the inside to the top of the bag.
You need to do the same with the second bead. The craft is ready!
Paper flowers, bells and school bells can be made quite interesting. They will serve as a good gift and attribute. They don't require a lot of consumables.
Newspaper and patience
The presented option is the simplest, and any beginner can handle it. In general, there are a lot of instructions on how to make a beautiful bell to decorate your home - we will present the basic and fundamentally different ones. Everyone will choose exactly what they like and what suits their imagination.
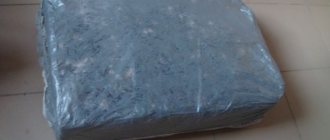
For the next product you will need several newspapers, some glue and paints. First of all, you need to twist the newsprint so that you get several tubes, a couple of millimeters thick.
We take the five resulting products, weave two so that they are perpendicular to the three. As a result, there will be the usual crossing and ten ends.
You need to make a base from one end - we simply weave it around the braid we made earlier. The remaining ends will act as sides. When the base begins to grow in size, form a future bell - a glass is perfect for this task. When the main strip ends, simply connect it with another one, continuing the weaving.
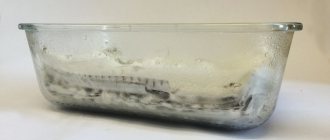
Afterwards, we remove the glass and use a more massive form - a bowl will be very useful. Its shape will allow for expansion.
When the desired shape of the bell has been obtained, you need to secure all the ends by tucking them under the transverse weaving. All that remains is to paint it and make a loop by which you can hang the product.